
Review this article to learn what to expect as you prepare for your session using the Seamless Desktop Recorder.
Getting Started
Introduction to the recorder
After you complete the microphone check during the recorder setup, you’ll review an animation of how to navigate between the task instructions and the content you'll give feedback on during your test.
With the task instructions open, you’ll review the test content the customer has provided. You'll need to keep the task instructions open during the entire session.
Example: A customer might ask you to visit their company's webpage and explain how easy or difficult it is to find a selection of products.
Tips for success
When you understand how to switch between the task instructions and test content, click Next to review a few reminders. You'll also have the option to watch a video with more guidance.
Starting the session
To continue the session, click the Start recording, and a countdown will begin.
Providing Your Feedback
The recorder basics
Once the countdown has finished, the session will begin. On the web page, you’ll find a red recording symbol to indicate that the recorder is now capturing your screen. Next to this symbol is a timer to track your time on the test.
You’ll also see the scenario on this page. The scenario is the mindset you should adopt throughout the session. Doing so will help you put yourself in the shoes of the target customer.
Example: If the scenario states: “...you are looking to buy a new pair of trainers…,” do your best to pretend you’re really buying new trainers, even if you’re not interested in making this kind of purchase.
Navigating between the task instructions and test content
When you clearly understand the scenario, click Open test page. The test page includes the content you should review during the test. After opening this page, return to the scenario by clicking the first tab.
When you're ready to continue, click Next to review the instructions for the first task.
Reviewing the scenario and previous tasks
If you need to review the scenario, you can click Scenario to view it. When you’re finished, click Close to return to the task instructions.
After you’ve completed the first task, click Next to continue to the following set of task instructions. Carefully read the instructions, then switch to the second tab or window to view the test content and complete your task.
When you’ve finished the task according to the instructions, return to the task instructions. You'll repeat this process until you have finished every task.
Pausing the test
Remember, it's important to complete your test in a distraction-free setting. If you're interrupted while providing feedback, you can use the Pause button and resume your test when ready.
It's often helpful to the customer if you briefly explain that you're pausing the test and will continue again soon.
Finishing the session
Sometimes, a test is difficult or impossible to complete. Depending on the situation, you'll need to either report a problem or quit the test.
Otherwise, when you've finished the last task in the session, you will share any final thoughts, questions, or suggestions you may have about your experience. This is a good opportunity to review what you shared during the session and to offer any other feedback you may have.
Skip to:
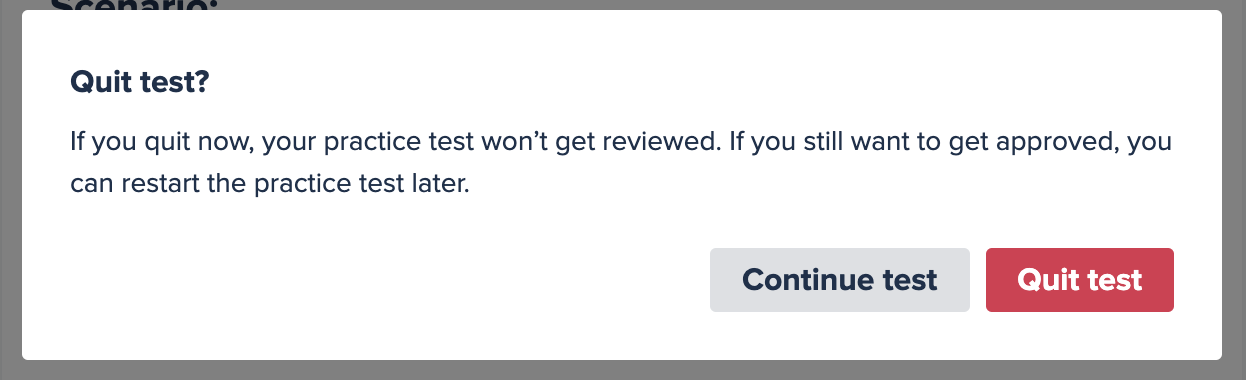
Quitting the test
If you decide you no longer want to complete the session, you can click Quit test.
Reporting a problem
If there's a major issue with either the recorder or the test and it's impossible for you to complete it according to the customer's instructions, you should report a problem.
Follow these steps to report a problem during your test:
-
Click Help.
Before you continue, you’ll have the chance to review some support resources, including a link to our Contributor Support Center and a video with tips on providing feedback during your test.
- If you can’t find a solution to your issue using either of these resources, go ahead and click Report a Problem.
- On the Report a Problem screen, select the option that best describes your problem, and then provide a detailed description in the More details field.
Sharing final thoughts
Once you’ve shared your feedback, click Stop recording.
You'll then answer a few “Final questions." Once you're ready to submit your responses, click Finish test.
A window will appear to show the progress of your upload. Please keep this window open until this process is complete. You’ll know your test has successfully uploaded when you see the screen with the message, “Great job!”